Adding Remote Capability To The Pioneer RT-909 Reel-Reel Tape Deck
Last updated: July 9th, 2019
DIY to add a remote connector to the back of the deck so you can use a wired remote or one of my wireless remote adapters.
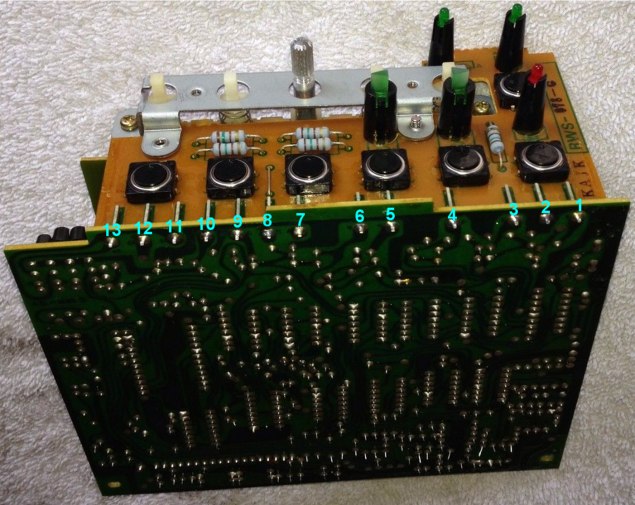
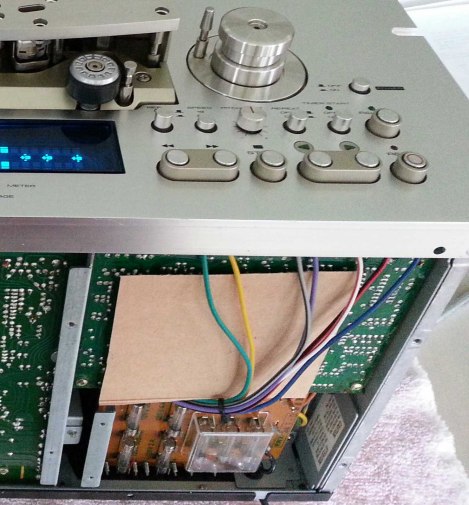
The first picture below left shows the Pioneer RT-909 transport control boards. The connections from the button board to the main board are numbered 1 through 13 just like in the service manual. This is where you will need to solder wires to for the remote connector. The picture below right is of a modified deck with wires soldering in place.
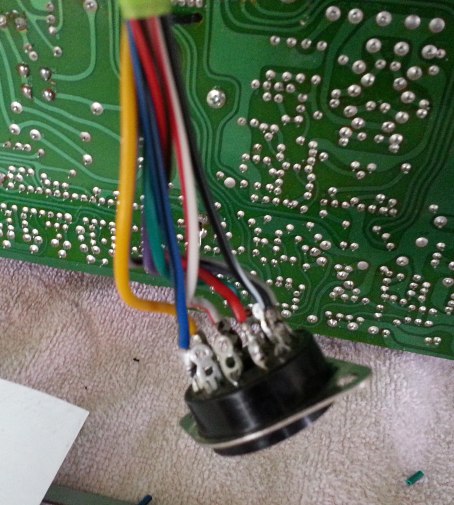
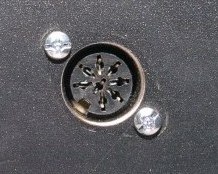
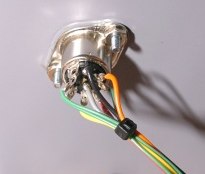
These pictures show a customer who used my Akai RC-70 remote with the 11-pin tube socket connector. The 11-pin tube socket is big and requires a 1.15" diameter hole. If you don't have a chassis punch cutting a hole that size isn't easy, but, if you want to go that route the connector is P/N 77-MIP11 and at last check it was $31.89. I prefer the Akai RC-90 or Nakamichi RM-580 remotes with the 8-pin DIN connector (see further down).
The table below has the connections from the deck to the
remote connector for both the 11-pin tube socket and the 8-pin DIN
socket.
|
Pioneer
Pin # |
Function
|
Akai RC-70
11-pin Tube |
Akai RC-90
DIN-8 Socket |
Nak
RM-580
DIN-8 Socket |
|
1
|
Pause |
10
|
1
|
4 |
|
2
|
Ground |
6
|
Shield
|
7 |
|
3
|
Record |
7
|
7
|
1 |
|
4
|
Forward Play |
2
|
4
|
6 |
|
5
|
Reverse Play |
3
|
6
|
--- |
|
6
|
Stop |
5
|
5
|
2 |
|
9
|
Fast Forward |
1
|
2
|
3 |
|
10
|
Rewind |
4
|
3
|
5 |
|
??
|
+12V |
---
|
---
|
8 |
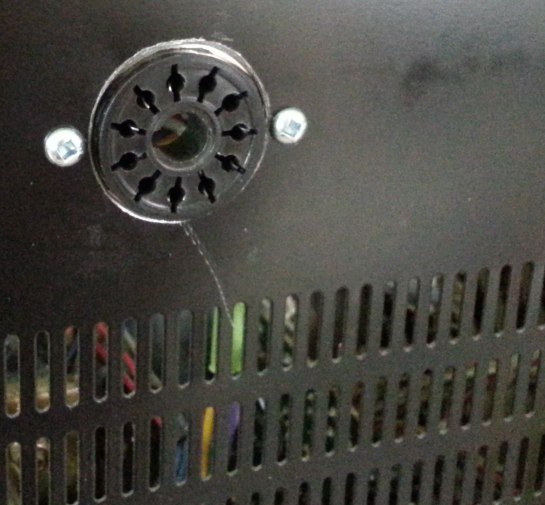
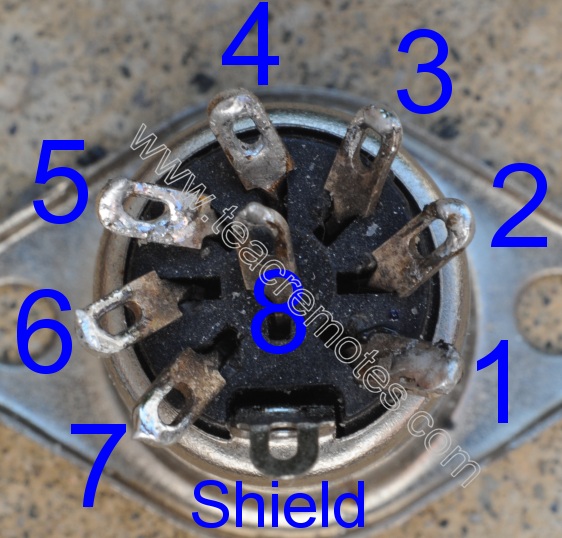
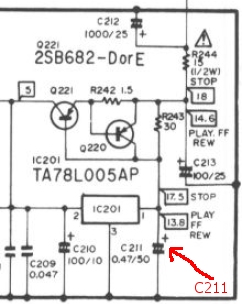
If you use my Akai RC-90 or Nakmichi RM-580 wireless remote you need to mount the smaller DIN-8 socket which requires a 5/8" (0.625") diameter hole which you can easily do with a step drill. The connector is also a lot easier to find and far cheaper. It was only $1.39 from my local electronics store. Using a step drill I popped a 5/8" (0.625") hole on the back that's out of the way of any brackets or components. Then I located and drilled a couple holes to mount the connector. Since I was using #4-40 hardware I used a #30 drill (0.1285") for a free fit. Now that the connector is mounted I wired it up to the board. The DIN-8 may have pin numbers on the back molded into the plastic, do not follow them. Follow the pinout shown in the picture below when using my Akai wireless RC-90. You can click on the picture to bring up a larger version. If you use the Akai RC-70 or RC-90 remote you will need to provide power to the remote receiver box via the 2.1mm x 5.5mm barrel jack connector. If you use the Nakamichi RM-580 remote adapter you will not be able to control Reverse Play, but, you will be able to power the remote adapter from the tape deck and the 7 - 12 Volt external power supply is not required. Currently I do not know where to get 7 - 12 Volt power from the deck. I see +5 Volts, which won't work, and I see +13.8 - 17.5 Volts on C211 (service manual says 13.8V in play, ff and rewind and 17.5V while in stop), which is close and can be made to work. The problem is my receiver has a 16V tantalum capacitor on the input which should not exceed 15V. If you use 5 general purpose silicon diodes each with a 0.6 Volt forward drop that would lower the voltage by 3.0 Volts or so. Then the voltage would be 10.8 - 14.5 Volts which should be fine. See schematic below. I have no idea where C211 is on the circuit board.
Remote adapters are also available for Aiwa, Akai, Ampex, Crown, Denon, Nakamichi, Otari, Pioneer, Revox, Sony, Studer, Tandberg, Tascam, Teac and Technics decks.
Pioneer JT-211 for 6-function wired remote for
RT-2022, RT-2024 and RT-2044
Pioneer JT-216 8-function wired remote for CT-9R, CT-8R,
CT-7R, CT-6R, CT-F1050, CT-90R, CT-70R, CT-980 & CT-970